Add Product function
Add product
This function of drag&drop editor will allow you to easily add products from your e-shop to the e-mail.
Insert the “Add product” placeholder
To the structure where you want to add the product you need to place the HTML element (if you want products in 3 columns you need to place the HTML elements three times in every column).

Into this element insert this code:
<a id="product****" class="X" href="http://yottly.com"><img src="https://via.placeholder.com/120x200.png?text=product****" style="max-width:100%; "alt="Yottly" /></a>
- Where “****” you need to change to attribute 1 – 10. Every added product needs to have a different attribute.
- X – select 1,2,3, or 4 according to the number of columns in your row
If you set it up right, in 3-column structure you should see these placeholders:

Add and adjust product visualisation
Then you can begin with adding the products:
- Choose “Add product” from main editor menu
![]()
- Then choose which of the placeholder you want to edit

- Choose product you want to add – you can decide if you want just products in stock or all and search by title of by ID
![]()
- Afterwards in editor you are able to style the product visualisation fully:
- Container: depending on width of the e-mail and number of columns you are using set up the size of the container (for 3 columns and width of the whole e-mail 750 pxls you set up width of the container to 250 pxls)
- Image: You can set up size and a position of product image
- Title, description, price, priceBefore, button: You are able to change colors, fonts, sizes, styles and a position of the elements, also if you click into the view on the text elements, you can rewrite it directly.
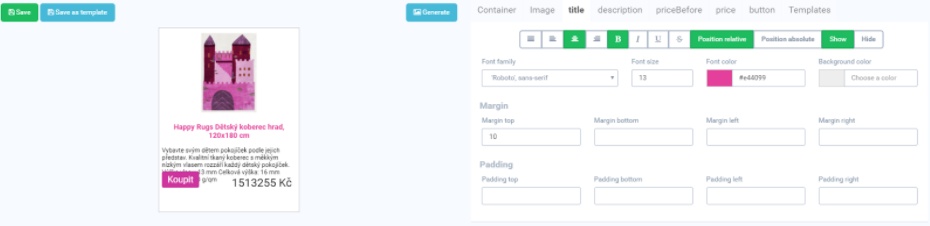
- Every element can be hidden by the Show/Hide switch in the editor

- Also a position can be altered by dragging chosen element if you select “Position absolute”.
- When finished with styling the product visualisation you can save the settings as a template by “Save as template” button. Also already saved templates can be edited (Load template in Templates tab) and saved again by “Save” button.
- Already prepared templates you can find in Templates tab and load those for chosen product.

- To add prepared product visualisation into the e-mail use “Generate” button.